Walking into a PSA Civil Registration System outlet without the right documents is one of the most common and entirely avoidable reasons people leave empty-handed after a confirmed appointment. You booked your slot, took time off work, commuted to the outlet, waited in line, and then discovered at the counter that you are missing a photocopy, the wrong person signed the authorization letter, or your ID has expired. The entire trip becomes a waste, and you are back at the beginning searching for a new available PSA appointment online slot that might be weeks away.
This complete guide tells you exactly what to prepare before your PSA appointment by document type, by requestor type, and by situation so that everything you need is ready and organized the moment you arrive at the outlet.
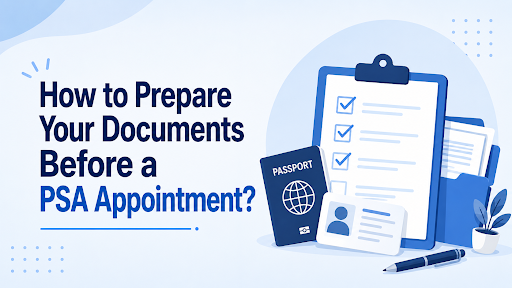
Why Document Preparation Matters for PSA Appointments
The PSA CRS outlet system operates on a strict appointment-based model with no walk-in exceptions. Each appointment slot is a fixed time window, and the transaction must be completed within that window. If documents are incomplete, the staff cannot process your request and your slot is forfeited.
Beyond the wasted trip, there are two additional consequences of showing up unprepared. First, getting a new appointment slot can take days or weeks, especially during peak enrollment season from April through June. Second, repeatedly showing up with incomplete documents creates a record of failed transactions that wastes PSA staff time and contributes to the backlog that slows the system for everyone.
Preparing properly the day before your appointment, not the morning, is the single habit that separates a smooth, one-visit PSA transaction from a frustrating multi-trip ordeal.
General Requirements for All PSA Appointments
Regardless of which document you are requesting or whether you are making the request for yourself or on behalf of a family member, every PSA CRS appointment requires the following:
1. Confirmed Appointment Slip
Your appointment slip either printed or saved digitally on your smartphone contains a unique QR code that the PSA outlet uses to verify your slot. Without it, you cannot enter or be processed.
The slip was sent to your registered email address when you completed your booking on appointment.psa.gov.ph. If you cannot find it in your inbox, check your spam or junk folder. If you have lost it entirely, log into the appointment portal using your reference number and registered email to retrieve or re-download it.
Always check that you are presenting the most recent version of your appointment slip. If you rescheduled after your original booking, the old QR code is no longer valid; only the new one from the rescheduled confirmation email is accepted.
2. Valid Government-Issued ID
Every PSA appointment requires at least one original, valid government-issued ID. The following are accepted:
- Philippine Statistics Authority National ID (PhilSys ID)
- Philippine Passport
- Driver’s License issued by LTO
- UMID Card (SSS or GSIS)
- Voter’s ID or Voter’s Certification with photo
- PRC ID (Professional Regulation Commission)
- Senior Citizen ID issued by OSCA
- PWD ID issued by the NCDA
- IBP ID (Integrated Bar of the Philippines)
- School ID with registration form for students currently enrolled
Your ID must be original not a photocopy and must be currently valid. An expired ID, even a government-issued one, is not accepted as primary identification at PSA outlets.
Bring one clear photocopy of your valid ID as well. Some PSA outlets retain a photocopy for their records, and having one ready avoids delay.
3. Cash Payment
PSA CRS outlets accept cash payment on the day of the appointment. The standard fees are:
- Birth Certificate: ₱155 per copy
- Marriage Certificate: ₱155 per copy
- Death Certificate: ₱155 per copy
- CENOMAR (Certificate of No Marriage): ₱210 per copy
Prepare exact cash or small bills. Cashiers at PSA outlets may have limited change available, and fumbling for the right amount slows down your transaction and creates delays for everyone behind you in the queue.
Some PSA outlets also accept cashless payment confirmation with your specific outlet before your appointment. If in doubt, bring cash.
Documents Required by Transaction Type
Requesting Your Own PSA Birth Certificate
For Filipino citizens requesting their own birth certificate:
Required:
- Confirmed appointment slip (printed or digital)
- One original valid government-issued ID with a clear photocopy
- Cash payment ₱155 per copy
Personal information to know:
- Your complete legal name first name, middle name, last name exactly as registered
- Your date of birth day, month, and year
- Your place of birth city or municipality and province
- Your mother’s full maiden name
- Your father’s full name
PSA staff will ask these details to search the database. Having them confirmed and written down prevents errors that slow the search.
Requesting a PSA Marriage Certificate
For married individuals requesting their marriage certificate:
Required:
- Confirmed appointment slip
- One original valid government-issued ID with photocopy
- Cash payment ₱155 per copy
Information to prepare:
- Full legal name of both spouses before and after marriage
- Date and place of marriage city or municipality, province, and year
- Name of the church, civil registry office, or venue where the marriage was registered
Requesting a PSA Death Certificate
For family members requesting a death certificate:
Required:
- Confirmed appointment slip
- One original valid government-issued ID with photocopy
- Cash payment ₱155 per copy
Information to prepare:
- Full legal name of the deceased
- Date and place of death city or municipality and province
- Date of birth of the deceased
Requesting a CENOMAR (Certificate of No Marriage)
For individuals requesting a Certificate of No Marriage for themselves:
Required:
- Confirmed appointment slip
- One original valid government-issued ID with photocopy
- Cash payment ₱210 per copy
Information to prepare:
- Your complete legal name
- Your date of birth
- Your place of birth
- Your parents’ names
Documents Required for Third-Party Requests
When you are requesting a PSA document on behalf of another person, a family member, a spouse, a child, or an employer additional documents are required to establish your identity and your authorization to make the request.
Authorized Representative Requirements
When a representative requests on behalf of another person, the following must be presented:
From the document owner (the person whose record is being requested):
- A signed Authorization Letter addressed to you as the representative handwritten or typed, signed by the document owner, specifying your name, your relationship to them, and the specific document being requested
- A photocopy of the document owner’s valid government-issued ID both front and back if the ID is double-sided
From you as the representative:
- Your own original valid government-issued ID
- A photocopy of your own valid ID
The Authorization Letter does not need to be notarized for standard PSA document requests. However, it must be signed by the document owner; a typed name without a signature is not accepted.
Authorization Letter Template
If you need to write an authorization letter on behalf of the document owner, it should include the following:
- Date of writing
- Full name of the document owner
- Statement granting permission to you (representative’s full name) to request a specific document on their behalf
- Type of document being requested
- Signature of the document owner
A basic example:
“I, [Full Name of Document Owner], hereby authorize [Your Full Name] to request my PSA [Birth/Marriage/Death/CENOMAR] Certificate on my behalf. I am unable to personally claim the said document due to [brief reason]. Signed, [Signature and Full Name of Document Owner], Date.”
Keep the authorization letter straightforward and specific. Vague or overly general letters that do not name the specific document may be questioned at the outlet.
Parents Requesting on Behalf of Minor Children
Parents have an automatic right to request civil registry documents for their minor children without a formal authorization letter. Simply bring your own valid ID and the child’s personal information: full name, date of birth, place of birth, and parents’ names. If the child is being brought along, no additional documents are required for the minor.
Senior Citizens Requesting on Behalf of Themselves
Senior citizens are entitled to priority lane service at all PSA CRS outlets and may be accommodated without a prior appointment in many locations. If a senior citizen is attending with a companion or assistant, the companion must bring their own valid ID. The senior must still bring their own Senior Citizen ID or other valid government-issued ID.
Preparing Documents for Specific Situations
If Your Birth Certificate Has Corrections or Annotations
If your PSA birth certificate has been corrected through RA 9048, RA 10172, or a judicial process, the corrected annotated version is what PSA will issue when you request a copy. At your appointment, use the corrected legal name and details not the original erroneous information when providing your personal information to the staff. If you are unsure what name is currently on file after a correction, contact the Local Civil Registry of your birthplace or the PSA OCRG to confirm the current registered name before your appointment.
If You Were Born Abroad (Report of Birth)
Filipinos born abroad whose births were registered through a Philippine Embassy or Consulate as a Report of Birth can request their PSA birth certificate through the standard CRS appointment process. The same personal information is required: full name, date of birth, parents’ names. If a “No Record Found” result occurs, coordinate with the relevant Embassy or Consulate to confirm whether a Report of Birth was ever filed.
If You Are Requesting for Multiple Family Members
Each family member’s birth certificate is a separate request and requires a separate form and fee payment. You can request documents for multiple family members within a single appointment if the outlet policy permits it to confirm this with your chosen outlet when booking. Bring each person’s personal information written out separately, along with the appropriate number of copies of your ID and authorization letters for each person whose record you are requesting as their representative.
If Your PSA Record Cannot Be Found
If the staff performs a database search and your record is returned as “No Record Found,” this does not necessarily mean your birth was not registered. It may mean the record has not been digitized or that there is a mismatch between the information you provided and what is on file. In this situation:
- Ask the staff to attempt an alternative search using a slightly different spelling of the name or a different birth year
- Visit or contact the Local Civil Registry of your birthplace to confirm the registration details
- If the record genuinely does not exist, a late birth registration must be filed at the LCR before a PSA copy can be requested
The Day Before Your Appointment: A Preparation Routine
Rather than gathering documents on the morning of your appointment when you are already pressed for time, set aside 30 minutes the day before to complete this checklist.
Step 1: Locate and save your appointment slip. Open the confirmation email from appointment.psa.gov.ph and confirm the QR code is clearly visible. Save a screenshot to your phone’s gallery as a backup. If you rescheduled, confirm you have the updated slip, not the original one.
Step 2: Check your valid ID. Take out your primary government-issued ID and verify it is currently valid and not expired. Check that the name on it matches the name you will use at the PSA counter. Make one clear photocopy.
Step 3: Prepare the cash. Count out the exact amount required ₱155 or ₱210 depending on document type in cash. Set it aside in a separate envelope or pocket so you are not searching for it at the counter.
Step 4: Confirm the personal information of the document owner. Write down or type out the complete legal name, date of birth, place of birth, and parents’ names of the person whose document you are requesting. Use an older PSA copy, a passport, or school records to verify exact spelling. Do not rely on memory for unusual name spellings or old details.
Step 5: Prepare authorization documents if applicable. If you are requesting on behalf of someone else, confirm that the authorization letter is written, signed, and ready. Check that you have a photocopy of the document owner’s valid ID.
Step 6: Check your route and arrival time. Confirm the address of your PSA CRS outlet and check the travel time. Arrive at least 15 minutes before your appointment slot late arrivals may be skipped to the next queue, and some outlets will not admit you if your slot has passed.
What to Expect When You Arrive
When you arrive at the PSA CRS outlet:
- Approach the information desk or information marshal near the entrance
- Present your appointment slip QR code it will be scanned to verify your slot
- You will be directed to the correct queue or waiting area
- When your number is called, approach the counter with all your documents ready
- The staff will search the database using the personal information you provide
- If the record is found, you pay the fee and receive your PSA document within minutes
- If the record requires additional verification, the staff will advise you on next steps and a claim date
Senior citizens, PWDs, and pregnant women are directed to priority lanes upon arrival to inform the information marshal of your status when you present your appointment slip.
Common Reasons PSA Appointment Transactions Are Rejected or Delayed
Knowing the most common failure points helps you avoid them:
Expired ID: Even a recently expired ID is not accepted. Renew your ID before your appointment if it has expired or will expire within the next few weeks.
Authorization letter not signed: A typed or printed name is not the same as a physical signature. The document owner must sign the authorization letter not just print their name.
No photocopy of the document owner’s ID: Bringing an original ID for the document owner is appreciated but not always possible if they are absent. A clear photocopy is the required alternative. A blurry, torn, or partial photocopy is rejected.
Wrong appointment slip: Presenting an old appointment slip after rescheduling results in a “no valid appointment” response at the scanner. Always use the most recent QR code.
Incorrect personal information provided at the counter: If the name or birth details you provide do not match the civil registry database, the record cannot be located. Always verify details against an existing document before your appointment.
Insufficient cash: Having the exact amount avoids awkward change situations. The ₱155 fee is per copy if you need two copies, bring ₱310.
Frequently Asked Questions
Can I bring a digital copy of my ID instead of the original?
No. PSA CRS outlets require the original valid ID a photo or scan displayed on a smartphone is not accepted as primary identification. Bring the physical card.
What if the document owner cannot sign the authorization letter due to illness or incapacity?
If the document owner is unable to sign due to a medical condition, a legal guardian or next-of-kin may be able to request the document with appropriate supporting documentation such as a medical certificate and proof of relationship. Contact PSA appointment or visit the outlet in advance to confirm the specific alternative documentation accepted in this situation.
How many copies of my ID do I need to bring?
One original and one photocopy. Some outlets may need the photocopy for their records; others may only check the original. Having a photocopy already prepared avoids being asked to step aside while you find a photocopying service.
Can I change the number of copies I am requesting when I arrive at the outlet?
In most cases, yes you can request additional copies at the counter as long as your appointment slot is for that document type. Payment for each copy is collected on the day, so bring enough cash for the number of copies you may need.
What if my name is spelled differently on different IDs?
If the name on your primary ID differs slightly from the name on another document, a common situation after marriage, name corrections, or informal spelling variations bring an Affidavit of One and the Same Person to confirm that both name versions refer to you. This affidavit should be prepared and notarized before your appointment.
Final Thoughts
A PSA appointment is a fixed, valuable slot in a system that is often oversubscribed during peak periods. Treating it seriously by preparing every document the day before and verifying every detail against primary sources rather than relying on memory is the difference between a five-minute counter transaction and a wasted morning followed by another weeks-long wait for a new slot. The preparation required is minimal. One valid ID, one photocopy, your appointment QR code, exact cash, and the correct personal details of the document owner. For third-party requests, add a signed authorization letter and a copy of the document owner’s ID. That is everything. Get it ready the night before, arrive 15 minutes early, and your PSA appointment will be exactly what it was designed to be: a quick, efficient, same-day service that puts your civil registry document in your hands before lunch.